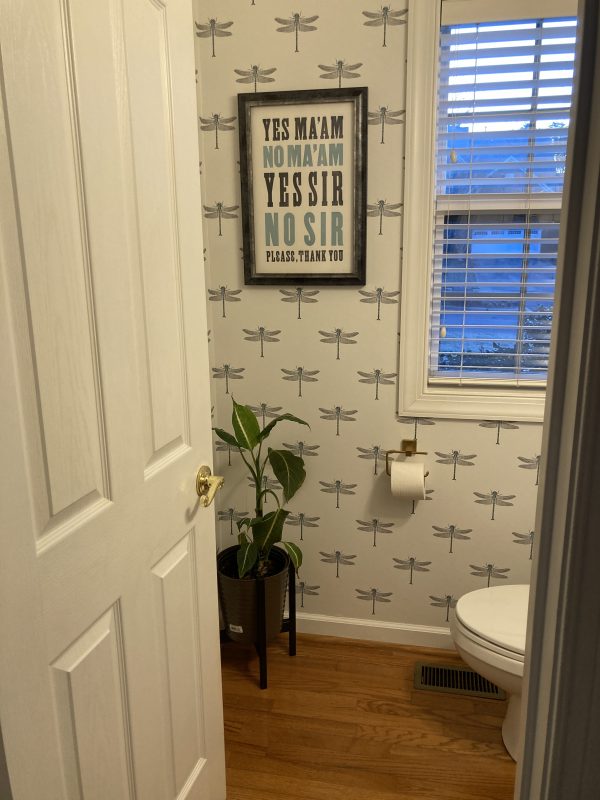
I decided to budget a portion of our end-of-the-year bonus to updating our downstairs half-bathroom.
It was in terrible need of a refresh, since it had holes in the walls, mismatched paint, and dated fixtures. It was not a place I wanted to welcome guests when they came over.
Still, I knew the bones of the room were good, and it had a decent pedestal sink, so I felt pretty confident we could get by with a cosmetic makeover.
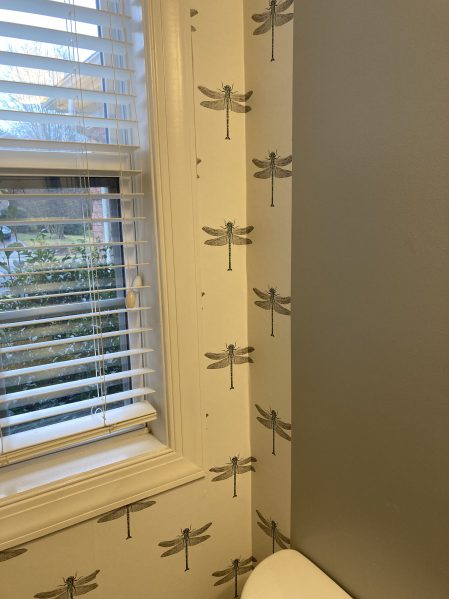
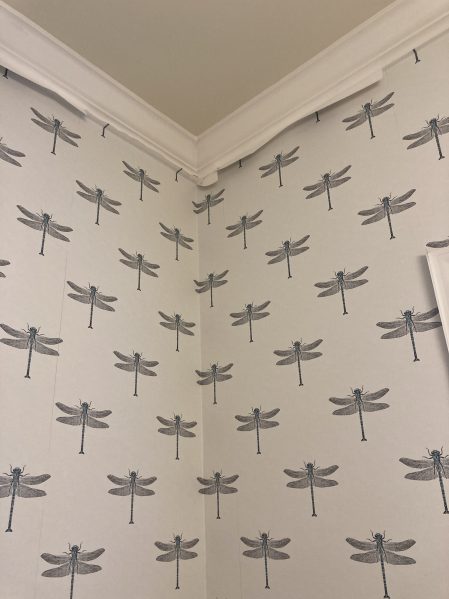
I’d always wanted to try peel and stick wallpaper, and I thought it would cover the holes in the sheetrock without me having to do much, so I decided to incorporate it into my budget.
Still, I wasn’t exactly sure how much everything was going to cost. I priced out a few fixtures online, a new light (the current one was a 90s monstrosity of painted-rust vines), and some wallpaper, and ended up with a budget of $650. I figured that would probably do it, but decided I could budget more later if I needed to.
In January, I decided to order everything I needed. I had a feeling that all of the brushed gold fixtures I wanted weren’t going to perfectly match, especially since I was ordering so much online, but I did order the same brand of toilet paper and towel holder, so at least those two would be the same. Almost everything else I ordered online.
I had absolutely no idea how much wallpaper I would need, so I decided to order a few rolls, put it up, and then see how far it went. This lackadaisical, slow approach to the whole project ended up working brilliantly, because I gave myself time to think about how everything was coming together, and I only had to order two more rolls of paper to complete the project.
I didn’t pick out my mirror until almost the end of the project, because I wasn’t sure what I wanted to get. When my sister showed me her friend’s website, though, and I saw the mirror she used, I knew I wanted a tilting model. So I found a mid-priced one on Amazon for $120 and ordered it.
We did every part of the project ourselves, except one: I was in the midst of installing the light fixture (something I’ve done tons before) when the electrical box got detached from the wall, and pushed straight in. I didn’t know how to fix it, so we called in our electrician. He ended up fixing the box and installing the light.
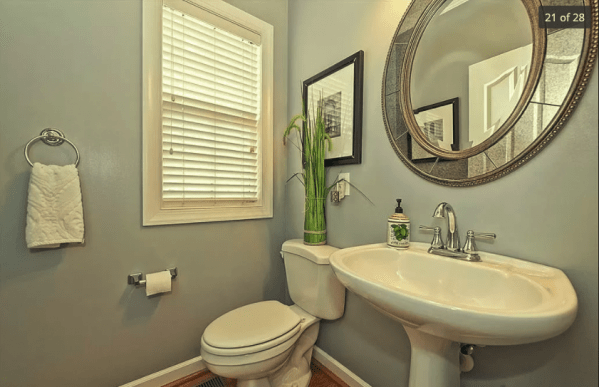
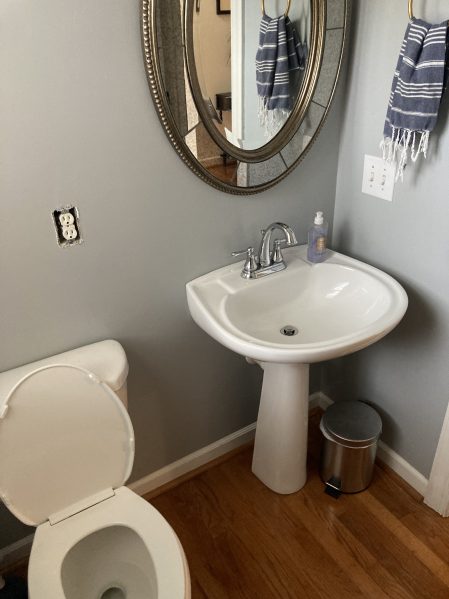
Who knows.
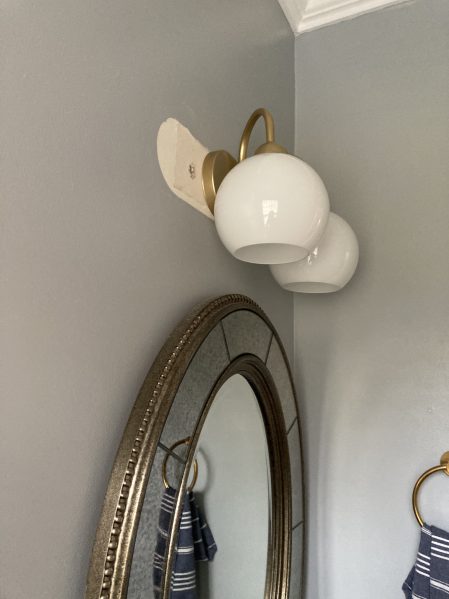
After we got the light fixture installed, and I had installed the new toilet paper holder and towel bar, I decided to give the peel and stick wallpaper a go. I had never wallpapered anything before, but I had a feeling I needed to use something flat and plastic to smooth out the wallpaper and make it stick to the walls. I was right. I used my bread dough scraper, a flat plastic contraption that worked perfectly. While the paper took some wrangling, it was pretty easy to match the lines and go over corners. The hardest part was cutting out pieces for windows, toilets, and sink connections.
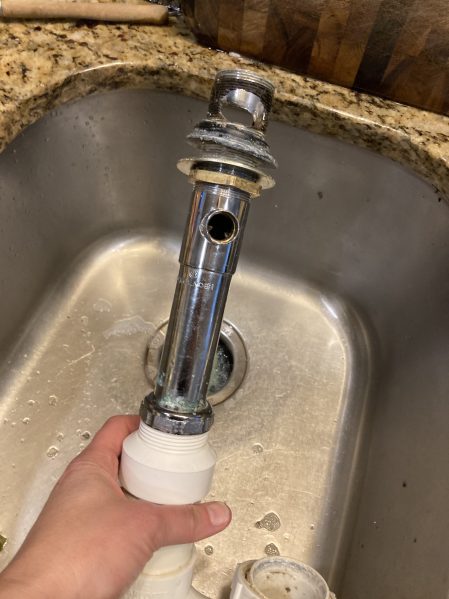
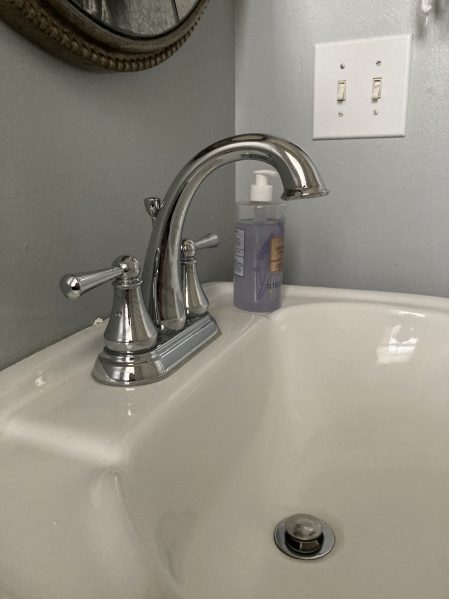
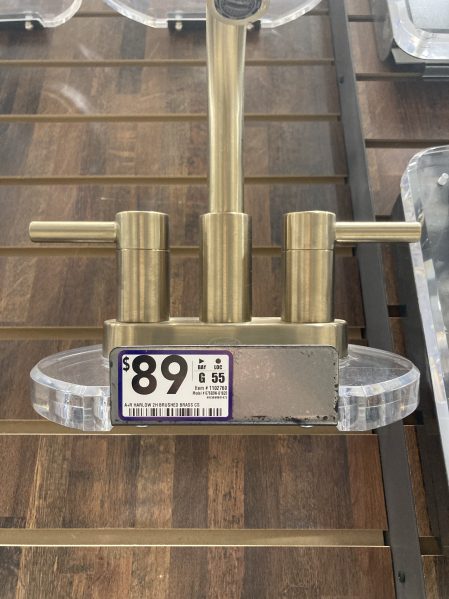
The very hardest part of the project, and the part that gave me the most satisfaction (well, I suppose tied with how well the wallpaper turned out) was changing the faucet on our sink. I didn’t think we’d be able to do it without help, but Mr. ThreeYear and I watched a couple of YouTube videos, yanked like crazy on the old plumbing, and got the new faucet installed.
The Cost Breakdown
This project wasn’t low cost, and I wasn’t trying to save money on it, necessarily. I wanted it to look very nice, so I budgeted for it. Here’s how the costs broke down:
Hardware:
New faucet, Lowes: $95.45 with tax
New toilet paper and towel holders, Lowes: $72.56
Pivot mirror, Amazon: $109.99
New light fixture, Lowes: $128.70
Labor:
Electrician: $90 (visit to fix the electric box and install the light fixture)
Decorative Stuff:
Dragonfly peel and stick wallpaper, Lowes: $223.08 for 5 rolls (approx. $42 per roll-it was on sale and then it wasn’t)
Plant stand, Amazon (I had the plant already): $37.30
Seagrass basket, Amazon: $17.11 (this is where I store an extra TP and towel)
Odds and Ends:
Exacto knife, Lowes: no idea, but we had to buy this. $10?
Total Project:
$784.19 (while this is an estimate, it’s pretty close).
I’m sure I’m forgetting some costs, but I will update as I think of them. I wasn’t very good in breaking them down in my budget (10 trips to Lowes, labeled “Bathroom Project”), so I’m not sure of the exact cost breakdown of each item. Still, these were the rough costs.
I don’t know how much my time is worth, in terms of labor, but I definitely approached the project in a relaxed and slow way, unusual for me. I didn’t kill myself to get it done, and it took around two months from the time I ordered the materials to the time I sent pictures to my family. Speaking of pictures…

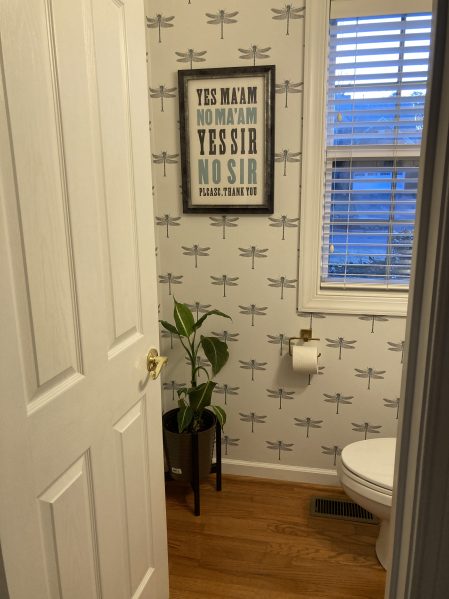
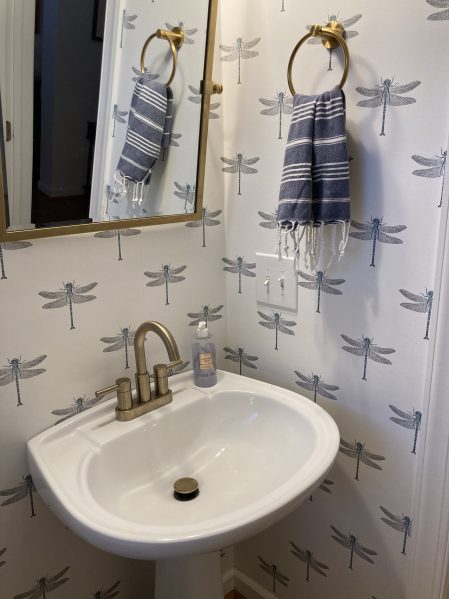
While I didn’t take a lot of “Before” photos, because I always forget to do that, I can assure you that the “After” is a complete 180. I love it, and I think it turned out just as I wanted it to: posh, cozy, and a lovely place to send my guests to “wash up.” Hope you like it too!

