Hi! If you’re new here, I’m Laurie and my family and I are on a three-year journey to location independence by doubling our net worth so we can move abroad.
During our three year experiment, one of our goals is to get our house ready for sale. To that end, we asked a realtor to visit last month and give her opinion of what needs to be done to make the house ready. It turns out, a lot. But the good news is, we have time to tackle all of these projects slowly, so we’ll be able to do a lot of the work ourselves.
Mr. ThreeYear and I are not DIYers. And we’re not especially detail-oriented. But we are committed to amplifying our skill set and learning in order to get the house ready.

This past weekend, we finished project one: updating the pendant lights in our kitchen. Our realtor recommended that we tackle one room at a time and do all the projects in that space before moving on. I thought that was a terrific idea. Our kitchen was an obvious choice.

The appliances in the kitchen are new. We had to buy all the appliances when we moved in. (That’s rare for a US house purchase, but we bought the house in a short sale, and the previous owners sold everything that wasn’t bolted down–they apparently even pulled up trees in the yard).
The cabinets and countertops are in good condition and we’re going to leave them as is. But we need to replace the kitchen sink faucet, which has a hole in a rubber button on top, replace the pendant lights, and repaint, because we did a slip-shod job when we moved in. (I couldn’t decide on the right color and we painted three times. That doesn’t lend itself to neat and tidy work).
I have never liked the pendant lights hanging in the kitchen, especially since two of them have stopped working since we moved in (turns out, jamming new bulbs in haphazardly is not good for the fixture). So I was happy to start there. Plus, since Mr. ThreeYear and I have changed a number of light fixtures during our marriage, I sort-of knew what I was doing.
Let me tell you how NOT to start a DIY project: in a fit of excitement, take down your existing fixtures, go to the home improvement store, buy one replacement light to test out, hang it, and wait for your hubby to come home to that “surprise.” It’s probably a much better idea to talk through options with said hubby, look at available replacement lights, and plan an installation schedule.
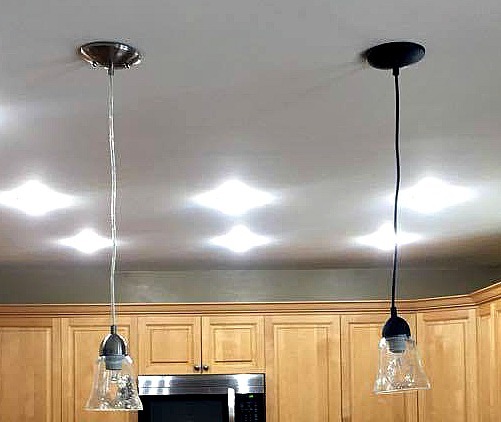
I, unfortunately, chose the former method. Mr. ThreeYear and I had a “heated” exchange (he is Latin and I am a hothead) and then, after everyone had calmed down, we decided to take the pendant light I purchased back to the store and keep looking.
One of the things Mr. ThreeYear pointed out was that the pendants I bought looked cheap. When you’re changing out pendant lights or other fixtures in your house, you may want to consider spending a bit more money here. In our case, you can see our kitchen lights when you walk through the front door, and Mr. ThreeYear wisely suggested that we put our renovation dollars into buying slightly higher quality pendants since they were so visible.
We looked at various online retailers, but eventually settled on a Carpenter-style square option from Home Depot.
Changing out pendant lights is not very difficult, even for a non-DIYer such as myself. Here’s what you’ll need.
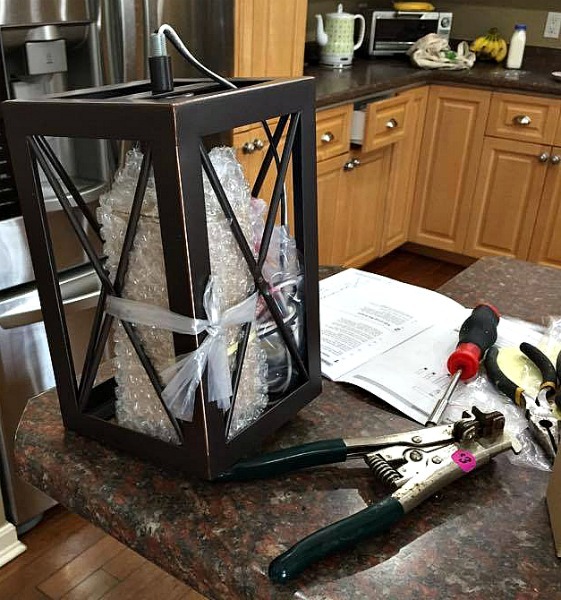
First, of course, turn off the electricity to the room you’re working in. I was being brave (stupid?) and just leaving the light switch off, but then, when the other kitchen lights were turned on, I got a little jolt so I wised up and turned off the breaker. I would recommend taking down the pendant lights already hanging in your kitchen.
You’ll need electrical tape, scissors, wire cutters, a small flat head screwdriver, a larger Phillips screwdriver, and a stool. Make sure you’ve got time, too. It takes a couple of hours to install. Also, if you have a partner to help you, things will go much more smoothly.
You may want to buy one pendant light, as I did, and test it first, to make sure the height and width work for the space in question. We actually tested three versions before settling on our final pick.
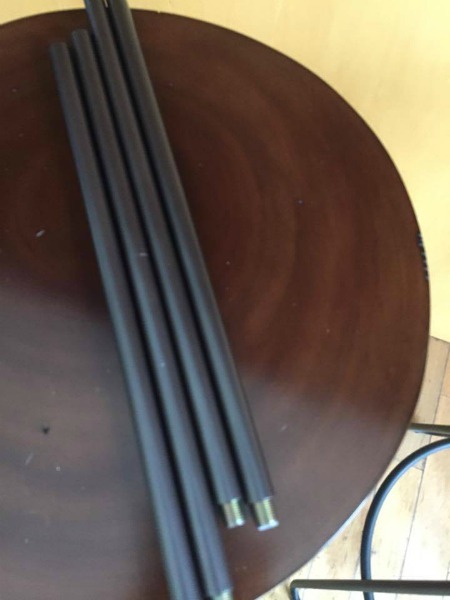
Then, unpack your lights and assemble. On most pendant lights, you’ll have to adjust the length somehow. Our first and second choices came with wire that you could pull through the top of the light to shorten, then tighten a screw in the side to hold it in place. Our third choice came with a bunch of metal bars that you could screw in to change the length. The metal bar pendant method was infinitely superior to the wire method, because it was so easy to get all of the pendants the exact same length (and we had three to change).
After you screw in the metal bar, you’ll have to thread the wiring through the bar and then cut off the excess (make sure to leave more than you think you need because it’s better to have too much wire than not enough).
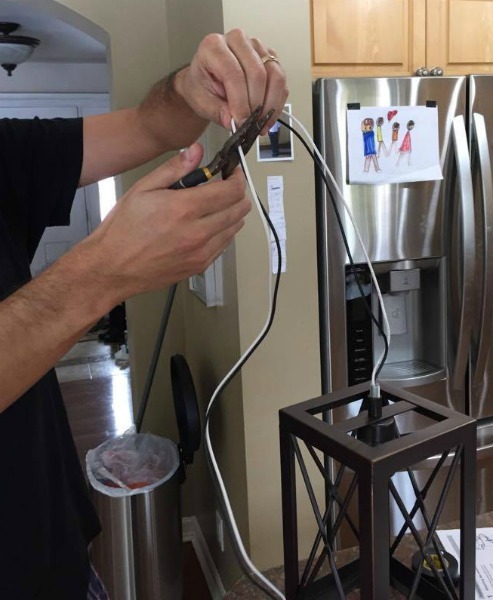
Pendant lights come with mounting hardware, a long, thin piece of metal that you screw into the appropriate holes in the junction box. We attached the mounting hardware that came with our pendant lights.
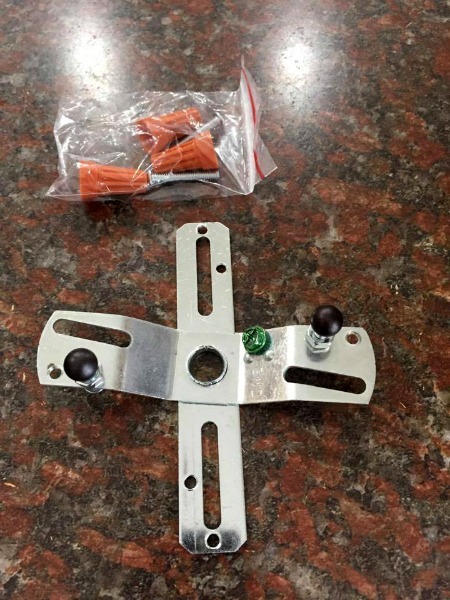
Then we used a small flathead screwdriver to unscrew the green screen on the mounting hardware (which you can see in the picture above), wrap the copper grounding wire (which might be encased in green) around two times, making sure to leave enough wire at the tip to attach to the grounding wire in the junction box. We capped the grounding wires with a wire nut, that little yellow, red, or orange plastic doohickey that looks like a knob. Then you attach black to black and white to white the same way.
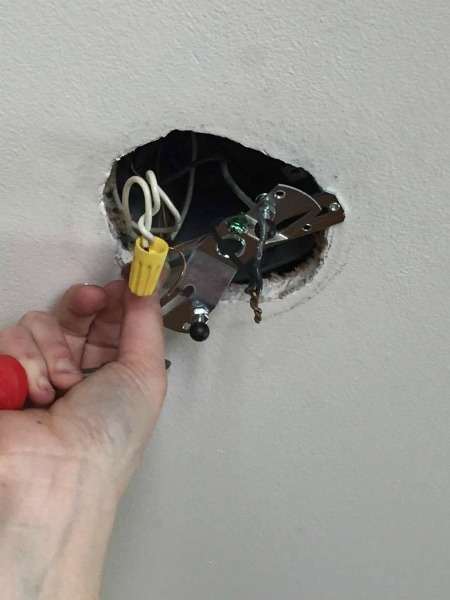
This is when it’s really handy to have a partner to hold the pendant up for you while you do this. Otherwise, it’s a lot tricker to make sure everything is wired correctly.
After that, cover the junction box with the cover of the pendant light–you have to be careful to align the two screws on either side. There are two little caps that you use to keep the pendant light cover on. Screw those on tightly so the pendant cover lies flush with the ceiling.
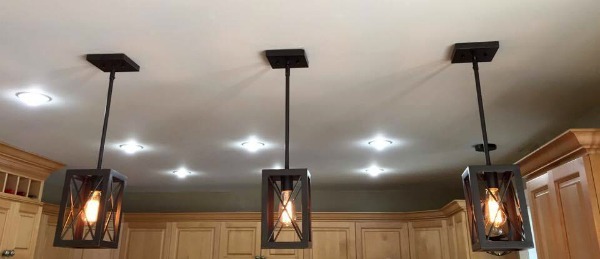
Ok–if that goes as smoothly as my typed-out version, you are my hero! It usually takes two or three tries to get everything wired properly. But once you’re done, you can put a cool retro bulb in your pendant, turn the electricity back on, and marvel at your handiwork!
We learned a couple of lessons from this project:
- it’s worth it to spend a little more on a quality product, especially if it’s in an especially visible area of your house.
- You may have to buy, install, uninstall, and return lights a couple of times to get exactly the right style. While this is a pain, it is infinitely better than living with a product you don’t really like.
- Take your time and plan DIY with another person, if possible.
That was our weekend DIY project! How about you? What’s the most adventurous DIY that you’ve tackled recently?

